


Updated: August 2026
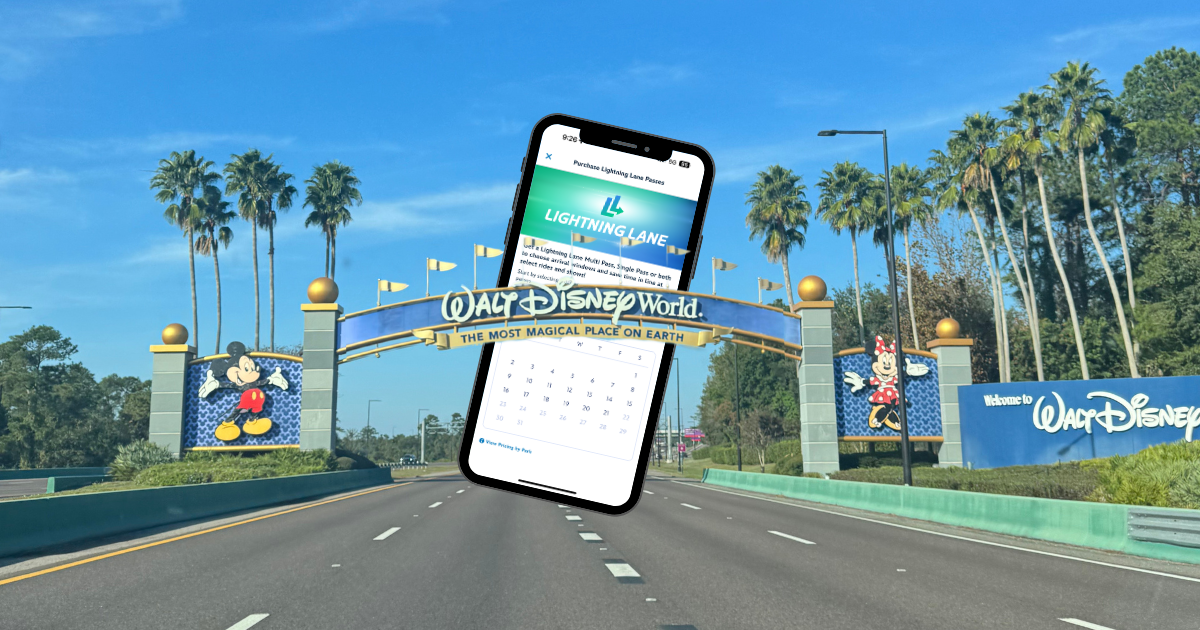
Here's how to book Lightning Lane (LL): open My Disney Experience, tap the Lightning Lane icon, and select your attractions and return windows. On-property guests can book Multi Pass — the option most families use — starting 7 days before check-in; everyone else, 3 days out. But knowing how to tap the buttons isn't what separates a smooth Lightning Lane day from a frustrating one. It's when you book and in what order.
I'm not going to spend 800 words explaining what LL is before I get to the good stuff. You've probably already read three “here's how it works” posts today. What I'm giving you instead is what I actually do — 7 days out, the morning of, and throughout the day — tested across a full year of trips with a family of three, and sometimes five when we bring extended family along.
I have an MBA in operations and project management, and LL is, at its core, a queueing problem with a booking window attached. That's exactly how I treat it. No hoping. No “we'll figure it out when we get there.” Just a plan, executed the same way every time, because it works.
Table of Contents
Lightning Lane, Explained Simply
LL is Disney's paid skip-the-line system. Most first-timers land here searching for one thing: Multi Pass — the option that covers the bulk of the park and the one this whole post is built around. But you'll also run into Single Pass, and, less often, Premier Pass, so here's the quick version of all three before we move on to actually booking them.
| Type | What it is | Cost |
| Multi Pass | Select up to 3 rides and arrival windows in advance; once you redeem one, you unlock a new selection — all day, one at a time | ~$15–39/person/day |
| Single Pass | Pay-per-ride, for the newest headliners not included in Multi Pass at all | ~$12–25/ride |
Multi Pass
It is what most families use, and it's what the rest of this post focuses on. You pick 3 attractions and windows before you leave for the park (or the night before), and every time you tap into one, a new selection becomes available. It's priced per person, per day, per park, and this is the option with the actual strategy behind it — which pass and slots to grab, and in what order, is the whole reason this post exists.
Single Pass
Covers the handful of rides so in-demand that Disney pulled them out of Multi Pass entirely: TRON Lightcycle/Run, Guardians of the Galaxy: Cosmic Rewind, Avatar Flight of Passage, and Star Wars: Rise of the Resistance. You don't need a Multi Pass to buy one — it's its own separate purchase, per ride, per person, and there's no real “strategy” to it beyond buying it early if it's on your must-do list.
On-property guests can book Multi Pass starting 7 days before check-in, covering their whole stay. Everyone else — off-property guests and day guests — gets a 3-day window instead.
Pro Tip: Watch the Multi Pass price itself. It moves with expected crowd levels, so a cheap price means a quieter day and an expensive one means a packed one. I check it against the park event calendar (Extended Evening Hours, EPCOT festivals, runDisney weekends, party nights) before I finalize which park we're doing which day.
What Is Premier Pass?
Premier Pass is a separate, pricier option worth knowing exists, even though it isn't the focus here. It's a one-time entry to every LL attraction — both Multi Pass and Single Pass rides — in a single park, for a single day, with no return times to schedule at all. You just walk up and go. It's priced accordingly: roughly $119 on a slow day at Animal Kingdom up to $449 at Magic Kingdom on a peak date, and it only covers one park per day. On-property guests can buy it up to 7 days before check-in; everyone else, 3 days out — same windows as Multi Pass, just a very different price tag. Most families don't need it, but if your budget has room and you'd rather not think about booking at all, it's there.
How to Book: Step-by-Step, App in Hand
This part really is simple, and it's the same every time:
- Open My Disney Experience and make sure everyone in your party — tickets, resort reservation, MagicBands — is linked under one account. Do this well before your booking window opens, not the morning of.
- Tap the LL icon or the Tip Board on the home screen.
- Select your attraction and confirm your return window. This is your Multi Pass flow — you're choosing from your 3 available selections. (Buying Single Pass or Premier Pass works the same way, just as its own separate purchase.)
- To modify a selection, open your existing pick under “My Day,” and look for the modify or cancel-and-rebook option.
- Redeem at the attraction by tapping your phone or MagicBand at the LL entrance during your window.
That's the whole mechanical process. What actually determines whether your day goes well isn't any of these five steps — it's the strategy underneath them, which is everything below.
The Pocket Guide walks through this exact flow with screenshots if you want a visual reference before your trip — grab it here and you'll have it saved on your phone for the morning your window opens.
My Booking Strategy: What to Grab First, and When
This is the section that actually matters, so let's slow down.
Before Your Park Day
Seven days out (or 3, off-property), the morning your window opens: I don't just grab 3 rides at random. I use what I call Burn, Shuffle & Hold — a simple way to think about your 3 Multi Pass slots so each one is doing a different job:
- Burn: the earliest possible return time you can get, even for a ride you don't care that much about. You redeem this one first, purely to unlock your next selection and get back in the booking queue fast.
- Shuffle: a ride with a return time before 11am that fits your land plan for the morning — flexible, and the one you're most willing to move around if a better time opens up.
- Hold: your actual must-do, the hardest-to-get ride on your list. Book it once and leave it alone — don't touch it again unless a genuinely better time shows up.
The real priority: get as many rides as possible. Once your initial 3 are set, the goal is to keep using and rebooking Multi Pass selections quickly all day — always moving through the park in your Loop Rule direction, never crisscrossing back for a return time. Speed and flow through the park come first, over holding out for a “perfect” slot on any single ride.
Here's why the Burn slot matters so much: redeeming that first LL is what unlocks your next selection. The sooner you use one, the sooner you're back in the booking queue. A Burn slot for 9:15am, even on a ride like PeopleMover, means you're pulling your next real selection by 9:20 — instead of sitting on 3 locked reservations for 1pm and missing three hours of booking opportunities in between.
During Your Park Day
On park day, the strategy I use is the same one I laid out in my Hollywood Studios One-Day Itinerary post: chain your LL selections by land, not by ride priority.
Don't book your favorite ride in Fantasyland for 10am and your second favorite in Tomorrowland for 11am — you'll spend your morning walking between them instead of riding. Finish everything reasonable in the land you're standing in before you book your next window somewhere else.
Personal Tip: I book my first Multi Pass reservation of the day before 1pm whenever I possibly can — for months now, if I wait, the popular return windows for headliners have already slid to 6pm or later, even when I booked exactly 7 days out at 7am. More families have caught onto this than you'd think. Don't be the one still deciding at noon.
Here's the whole timeline in one place:
| When | What I Do |
| 7 days out (or 3, off-property) — window opens | Rank top 3 rides ahead of time. Book all 3 Multi Pass selections at once; make one a “burner” (earliest possible return time). Buy any Single Pass rides separately, right away. |
| Morning of, before park open | Check the app for better return times on your existing selections, or better rides that might have earlier openings than what you booked. Have the app open and ready before you walk in. |
| First hour of the park day | Redeem the burner LL immediately to unlock your next selection and get back in the booking queue fast. |
| Before 1pm | Book your first “real” headliner reservation of the day — popular windows start sliding to 6pm+ after this. |
| Midday and mid-afternoon | Recheck the app for better return times on what you've already booked, or newly available rides that weren't there that morning. |
| All day | Chain new selections by land, not by preference, so you're riding instead of walking between them. |
Pro Tip: Refresh the attraction you actually want when you're standing right near it, not from across the park. We've had our best luck snagging an LL slot on a ride that looked fully booked by refreshing while sitting right in front of it — a return time can open up the moment someone else cancels, and you want to be close enough to grab it before it's gone again.
Common Lightning Lane Mistakes First-Timers Make
I've watched (and, in our first year, made) every one of these:
- Booking and holding LL too late in the day. If your 3 selections are all locked in for late afternoon or evening, you're walking the park all morning with nothing in hand — and standby lines are longest exactly when you have no LL to fall back on.
- Booking rides back-to-back that are far apart in the park. Chaining a Frontierland ride at 11am with a Tomorrowland ride at noon means you're running, not riding. Match your bookings to where you'll actually be standing.
- Skipping the “burner” LL in the first hour. Some families hold out for 3 perfect selections instead of taking an early, mediocre one just to get back in the booking queue faster. That patience costs you booking opportunities all day long.
- Not checking your app again mid-morning and midday. Disney releases additional LL inventory throughout the day. If you only look once at 7am, you'll miss better return times on rides you've already booked, or newly available slots on rides that looked full that morning.
My Tips for Booking Like a Pro
- Rank your top 3 before your window opens. Don't decide live — decide the night before, so you're not scrolling and comparing while the clock runs.
- Load gift cards and confirm payment methods ahead of time. Ride availability changes quickly if you are trying to buy something.
- Screenshot your LL selections each morning. Cell service in the parks is usually fine, but a screenshot means you're never stuck checking your day if it isn't.
- Recheck the app at rope drop and again after lunch. You're looking for better return times on what you've already booked, or newly available rides that weren't there before — this is the single most-skipped step I see.
- Use the price as your crowd read. A cheap Multi Pass morning means book loosely; an expensive one means book tight and fast.
Frequently Asked Questions
What's the difference between Lightning Lane Multi Pass, Single Pass and Premier Pass?
Multi Pass — the option most families use — lets you select up to 3 attractions in advance and unlock a new one each time you redeem, priced around $15–39 per person per day. Single Pass is a pay-per-ride option for the newest headliners not included in Multi Pass at all, around $12–25 per ride. Premier Pass is a pricier, less common option: one-time, unlimited access to every Lightning Lane attraction in a single park for a single day, with no scheduling, priced roughly $119–449 per person per day.
What time can you book Lightning Lane?
On-property guests can book Multi Pass 7 days before their check-in date, covering their entire stay. Off-property and day guests get a 3-day booking window instead. Single Pass rides can be purchased separately at any time, without needing a Multi Pass at all. Premier Pass follows the same 7-day/3-day windows as Multi Pass, if you go that route.
Is Lightning Lane worth the cost?
For most families, yes — especially on higher-crowd days, when standby waits for headliners routinely stretch past 60–90 minutes. On genuinely quiet days (which the Multi Pass price itself will tell you), it's more skippable. I treat it as a flexible add rather than an automatic yes for every single day of a trip.
Lightning Lane isn't complicated once you've done it a handful of times — it just rewards a plan more than almost anything else in the parks. Rank your top 3, grab a burner early, chain by land instead of by preference, and recheck the app more than once. That's the whole playbook, and it's the same one I use whether it's just the three of us or the whole extended family is along for the ride.
Want this whole system, plus the rest of my 7-days-out and day-of checklists, in one place? The free Pocket Guide to First Time Disney World has it — grab it before your own booking window opens.
Related Posts:
Until next time — go book that burner slot early, and I'll see you in the parks.





Comments +
Comments